Running Default Reports
To run a report, select Search/Reports on the main menu. You'll find an extensive list of ready-to-use reports.
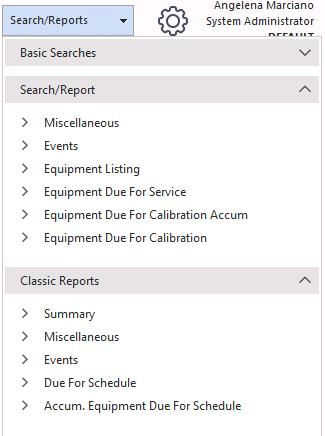
Search/Reports menu
When you click a report, the screen below appears. It's set up by default. You can click Finish to view the report, or click the Back buttons to make temporary changes to how the report looks.
Report — initial view
These reports are set up to return the information shown based on the data you currently use. In this example, the report has returned all calibration information due this month, by company.
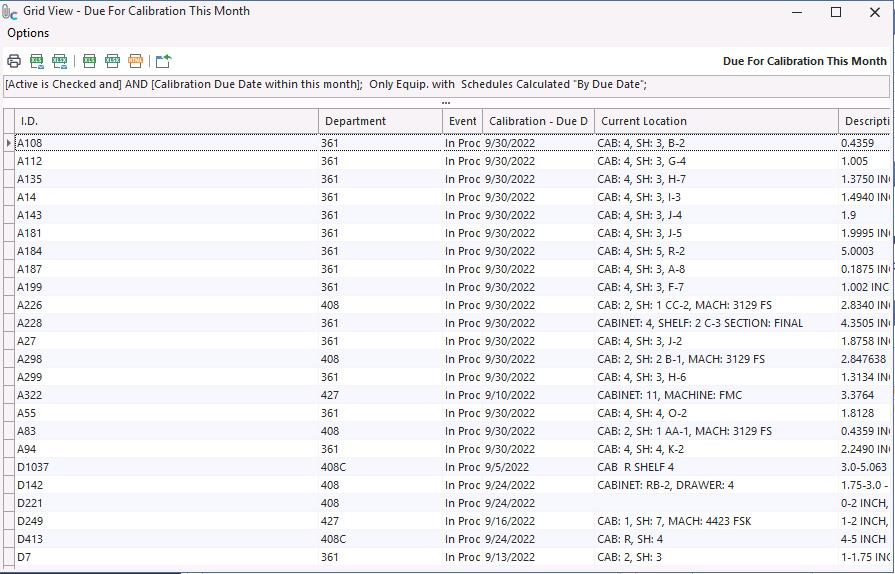
Report results
The five report steps
Five report steps
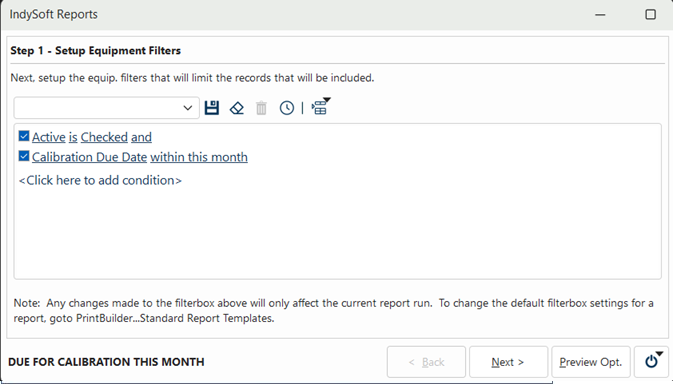
Step 1 — Equipment Filter
The Equipment Filter is preset and can only be permanently changed in PrintBuilder, but you can make a one-time temporary change when you open the report. For example, if you want Cal Due Date between today and 3 weeks from now instead of within this month, change the filter (security rights permitting). The change applies for this run only — closing the report restores the original setting.
Step 1 — Equipment Filter
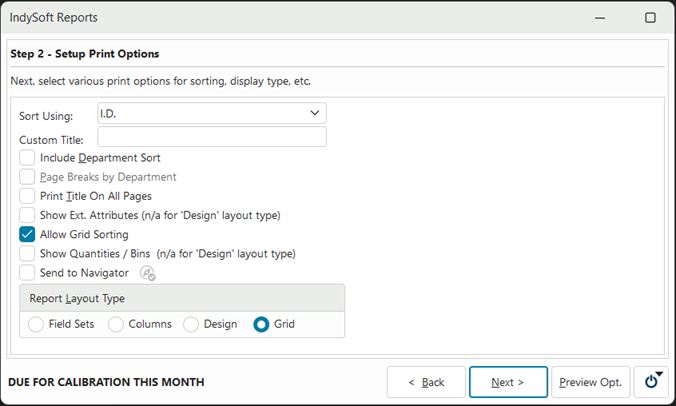
Step 2 — Print Options
Sort the report by an item of your choice and give it a custom title.
Step 2 — Print Options
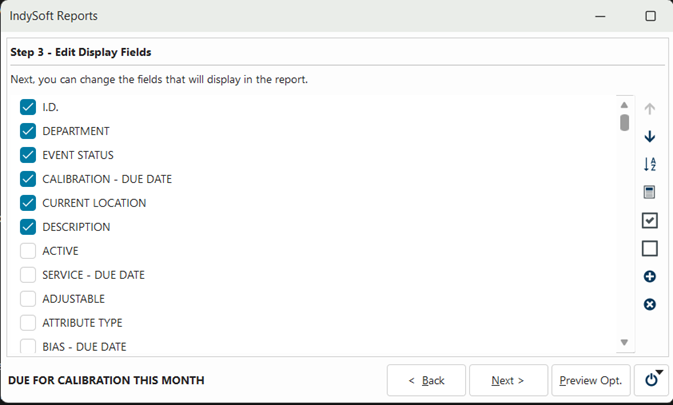
Step 3 — Display Fields
Pick the fields to display on the report.
Step 3 — Display Fields
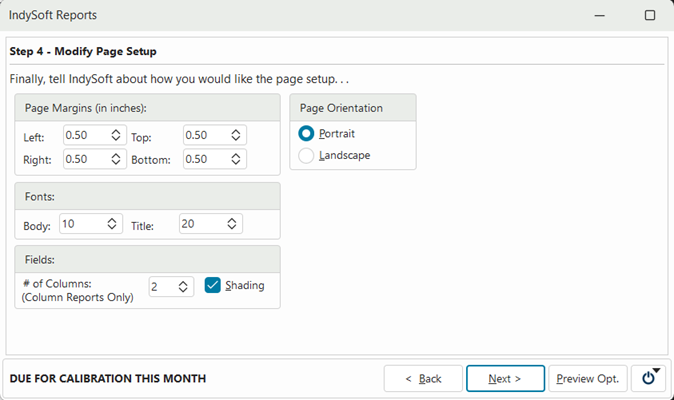
Step 4 — Modify Page Setup
Change orientation, page margins, fonts, and the number of columns. Only available for certain output types (Field Sets and Columns).
Step 4 — Modify Page Setup
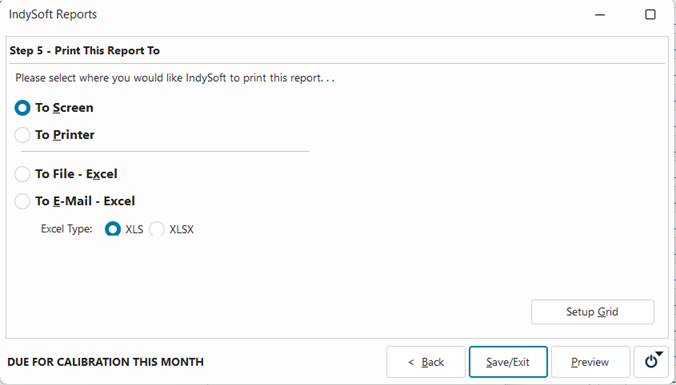
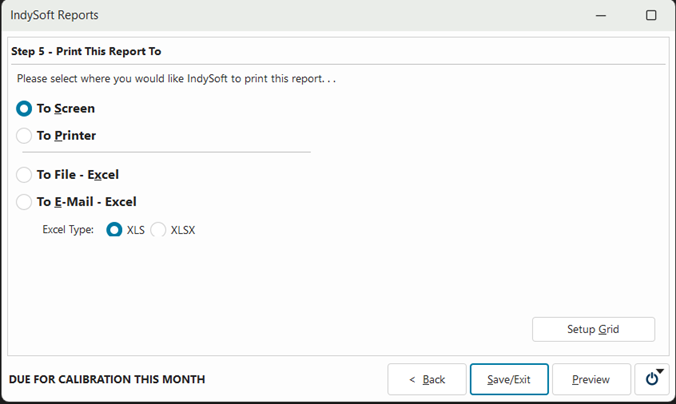
Step 5 — Print Report To
Choose where the report is sent using one of the four radio buttons.