Adding Equipment
Like the Search screen, the Add Equipment step of an action lets the user add equipment to an event in up to five different ways:
-
Type to search for related assets. Type-search looks for matching IDs, serial numbers, and descriptions. It's supported on all devices and uses lazy loading to avoid loading too many assets at once — only the top 10 matches show by default in a larger result set. Scroll down to load more (10 at a time), or refine the search by typing.
-
Scan an asset's QR code with the device's native camera. Click the icon in the upper-right to launch the camera.
noteBarcodes need to be either the
GAGE_SNfield or the distinct combinationCOMPANY~GAGE_SNto scan directly. -
Scan with a supported device's native barcode scanner if your device has one. If RFID mode is enabled, the user sees options to scan with either the native barcode scanner OR the RFID scanner. If RFID is disabled, the native barcode scanner (if detected) is enabled by default but isn't shown explicitly.
-
Scan the room or area for assets with a supported UHF barcode scanner. RFID scans from this screen support both high-power and low-power scanning. Unlike the Search screen, you can release and re-pull the trigger to keep scanning. Only devices paired with tags are added to the event.
-
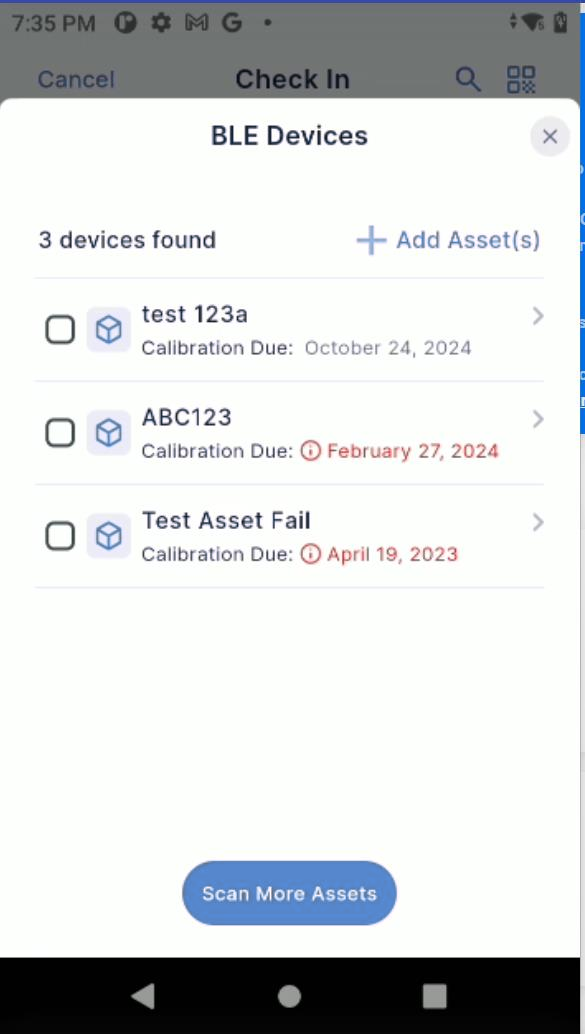
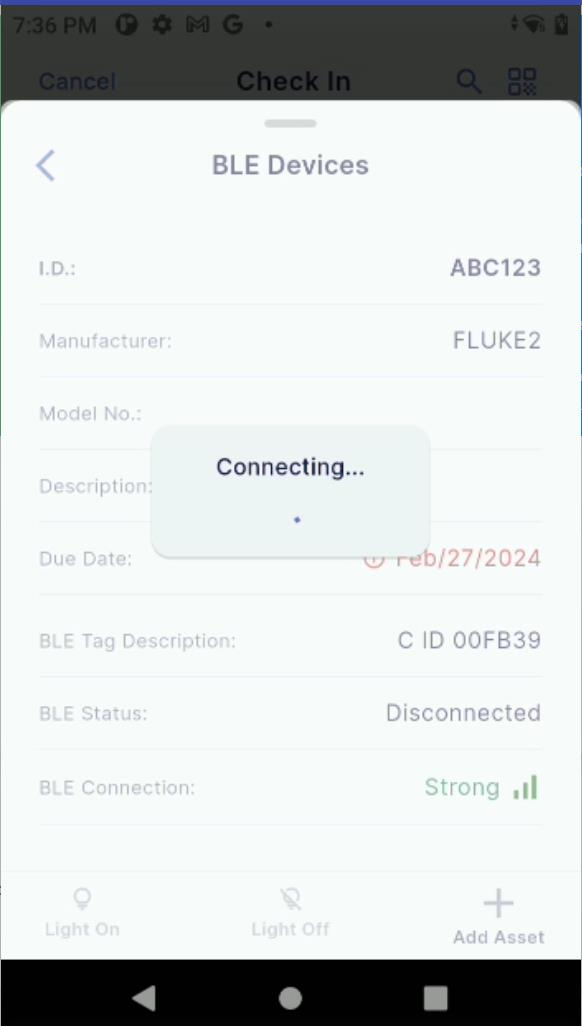
BLE scan — if BLE Tag Options is enabled, you can perform a BLE scan from this screen. Pressing the button shows a list of assets that are linked with BLE tags, are not already added to the action, and meet the action's selection-rule criteria. You can connect to devices from this option, or simply add them directly to the action.
Adding equipment — search and scan options
Adding equipment — RFID scan

Adding equipment — BLE scan
After assets are added, the Add Equipment screen shows the total assets selected, the total due for calibration, and lets the user sort by due date if desired. When an asset is successfully added, the device beeps and the newest asset appears at the bottom (unless sort-by-due-date is enabled).
Each asset row shows up to four pieces of information:
- ID
- Company (if enabled in settings)
- Gage description
- Due date
Settings can be enabled to automatically sort by due date and to play an alternate sound when a coming-due or past-due item is added.
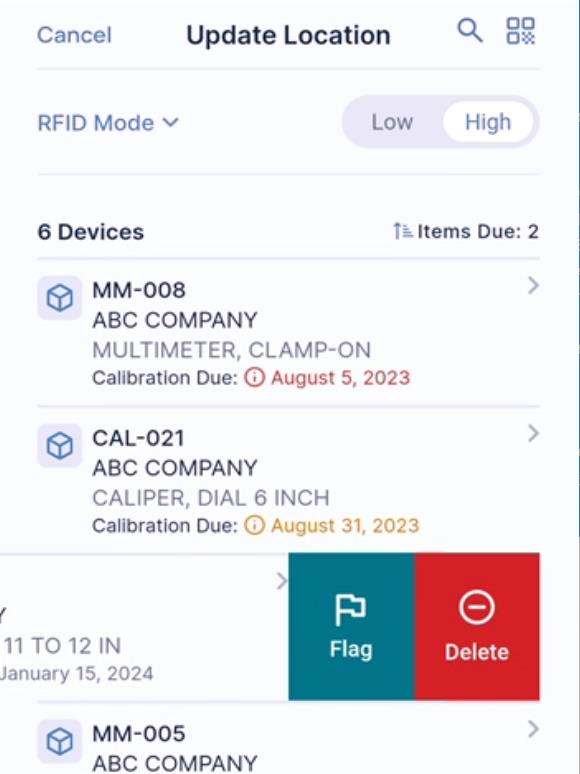
After adding assets, swipe a hard left on an asset to remove it from the list. A soft swipe left lets you either flag or delete the asset.

Asset list — flag and remove options
Asset list — confirmation
RFID and BLE scanning notes
When scanning tags into an action, all devices in the area that meet the Selection Rules in Workflow Configuration are added. Assets that don't meet the criteria are silently ignored — different from adding via barcode or search, which alerts the user when something can't be added.
A common workflow is to update the current location of equipment within scanning distance and simultaneously collect instruments due for calibration or service. Use the inventory scan to update equipment quickly, then use the Locate or BLE Scan features to find items that are due. After scanning the room, auto-sort by due date, or click the filter to sort the action by due date.
Locate and Flag options
RFID Mode
Use the Locate feature to physically find equipment in an action. With an RFID-capable device and an asset paired with a tag, tap the asset in the event to bring up the Equipment Details screen with the proximity wheel. Press the RFID device trigger to find the asset based on the strength of the returning signal.
Once located, use the Flag feature to mark items in the list as found. The flag has no implicit meaning beyond a visual cue — useful when collecting or processing many items in a list.
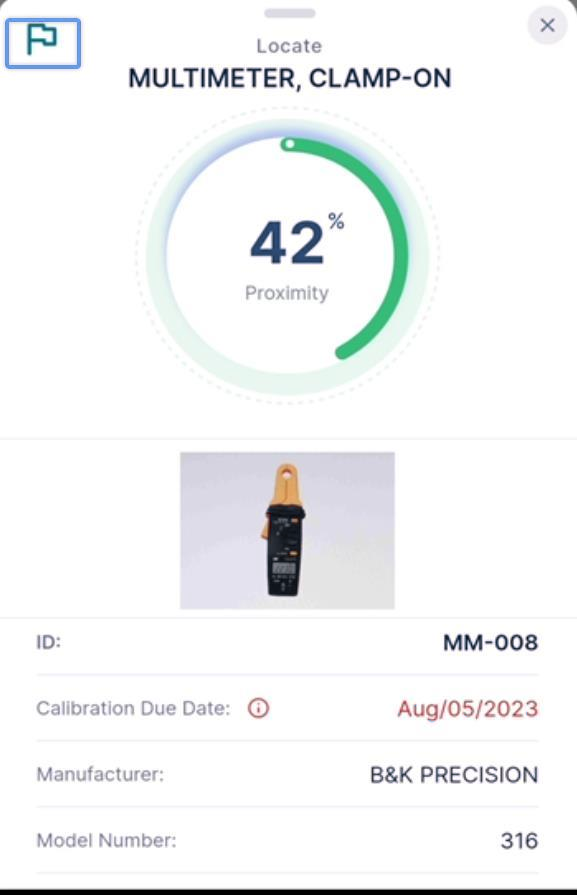
Locate — proximity wheel

Flag option
Canceling an event
Canceling an event after adding equipment offers to Remember that equipment for the next time you run the same event type. If you say Yes, the next time you start that event in the same session, IndyGo offers to use the saved equipment.